How To Guides
This short guide will explain the process for creating a new list and inviting your friends to view it. You can also view a step-by-step guide if you have received an invite and would like a guided process for selecting items to buy from the list.
How to Use The Big Gift List - How Do I set up Lists and Send Invites?
Step 1. Getting Started
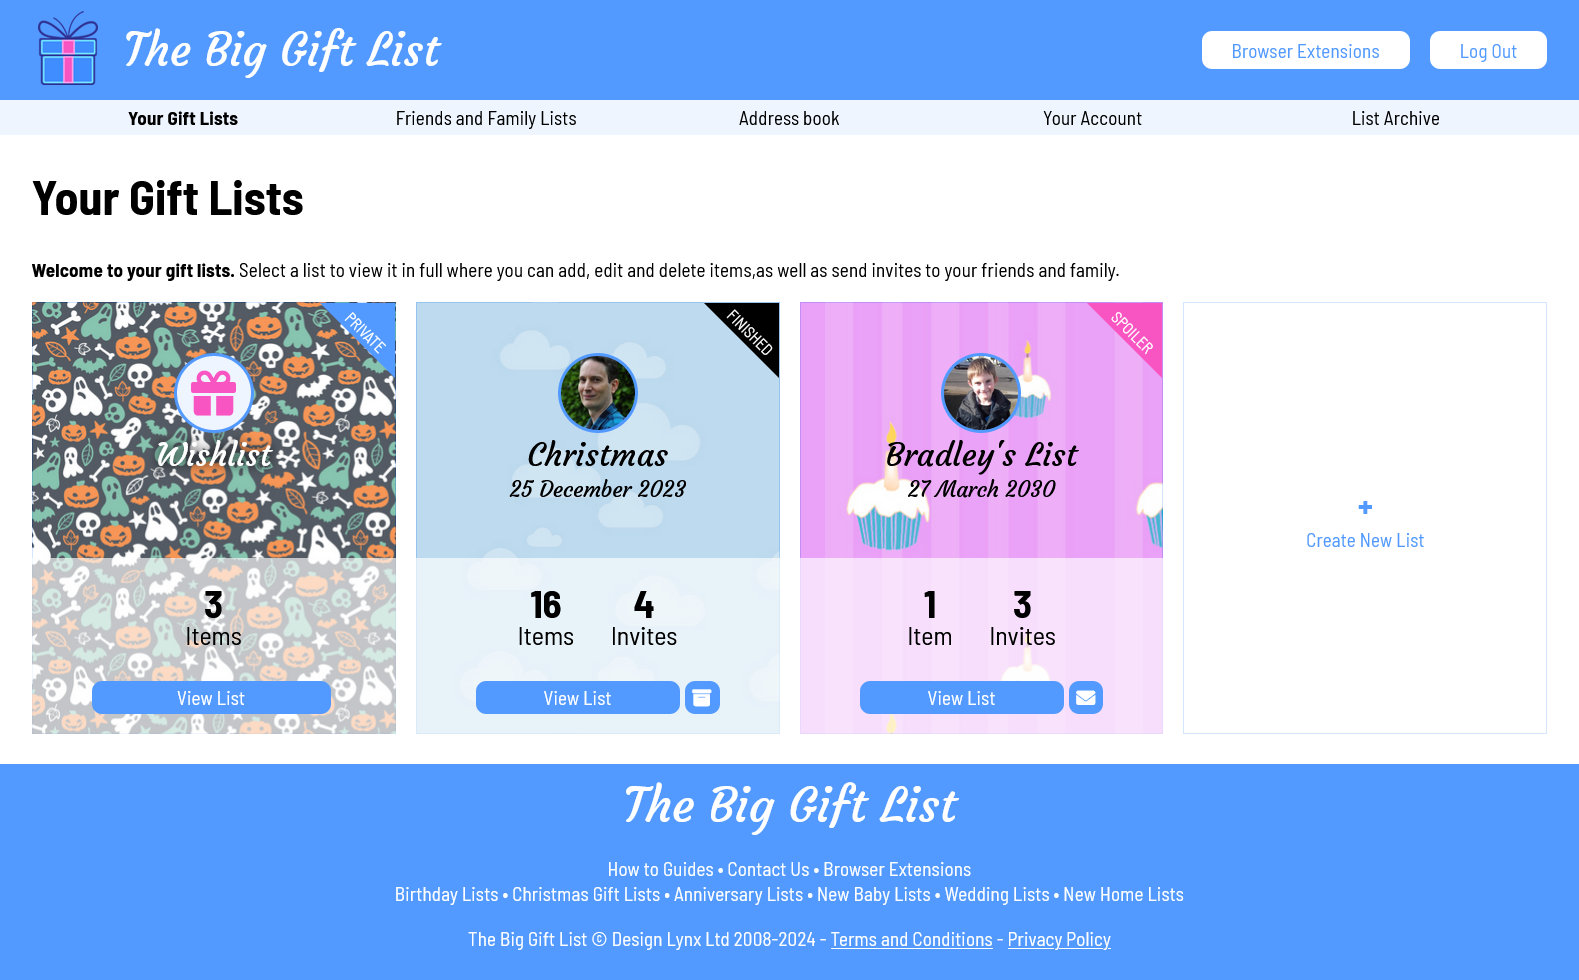
Once you have registered and logged in you will be presented with your lists page. From here you can quickly access your active lists. At the top of the page you will find the quick menu that will allow you to access all the main features of The Big Gift List; Your Gift Lists, Friends and Family Lists (including those lists you haven't been invited to yet), Address Book (for sending invites), Your Account (for updating your contact details) and the List Archive (where you can save finished lists).
To create a new list click in the 'Create New List' box which is displayed after all your active lists.
Step 2. Creating a list
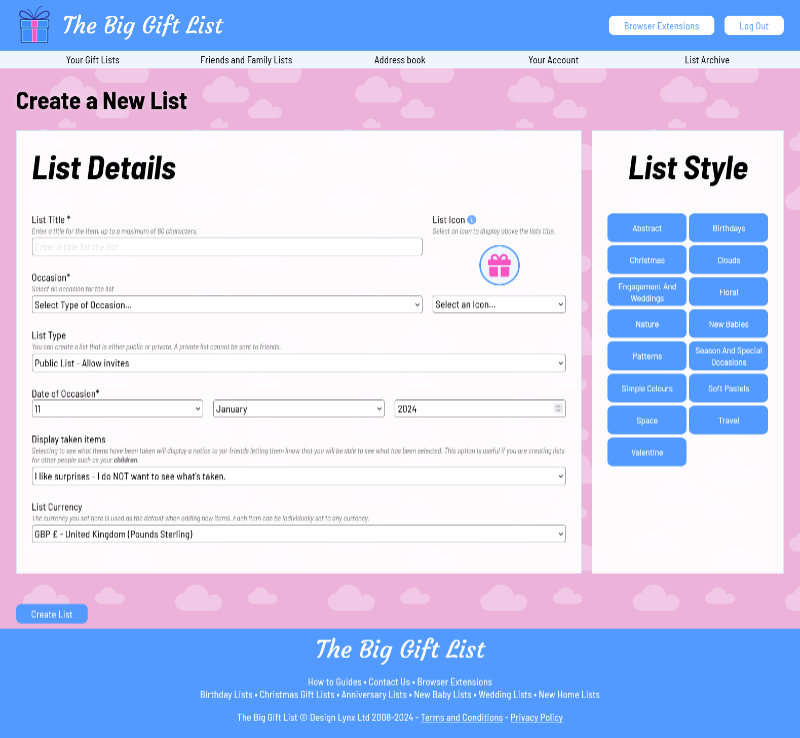
After click the Add New List button you will see a short form for setting up the list. You can enter a title for the list, select the occasion (wedding, birthday, etc), set the currency you want to use for this list (you can specify a different currency per item if you need to), select the date of the occasion, and choose whether or not you want to see what items are taken before the list ends (people invited to the list are notified that you will be able to see which item(s) they have selected prematurely).
On the right you can select one of many different themes for your new list. These range from simple colour choices, to patterns and pictures.
You can also select an icon, or upload a photo (perhaps of the person the list is for - please ensure you read the terms and conditions of the website before you upload your own images*), to attach to the list.
Once you've set everything up, click the 'Create List' button to finalise the details. Congralutations you've made your first list.
Step 3. Viewing your list
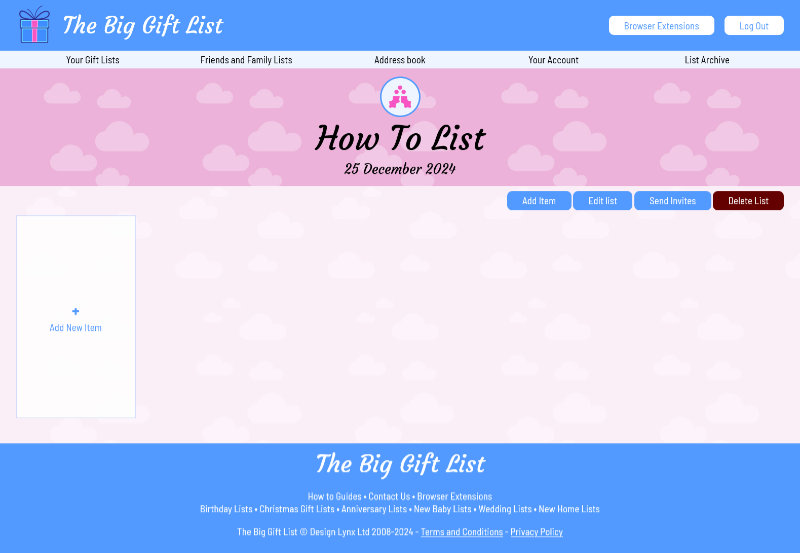
Once the list has been created you will be taken directly to the new lists page. Obviously as this is a new list there will be no items to display. To add your first item you just need to click the 'Add New Item' box (or start using the browser extension).
Lets add an item, click the 'Add New Item' button.
Step 4. Adding an item
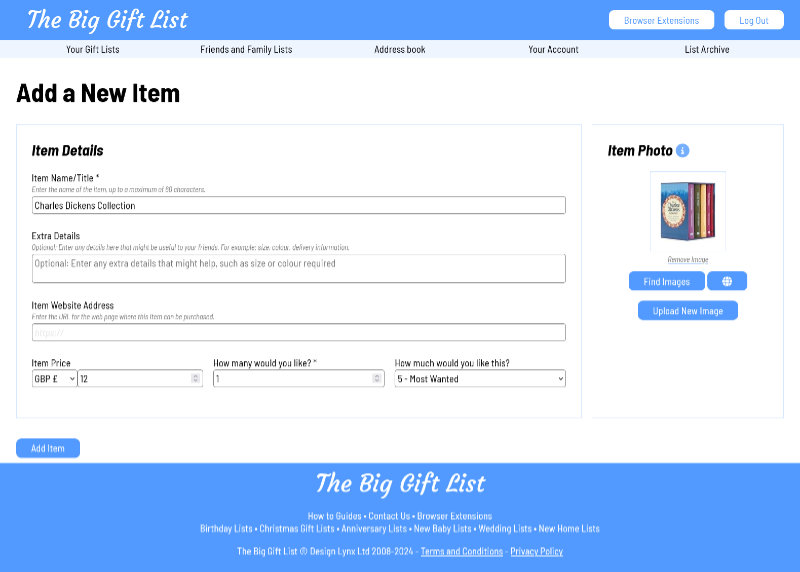
After selecting 'Add New Item' you will see a form broken down into different sections allowing you to enter information about the item.
Firstly, you will need to enter the basic information about the item you are adding. If you have found the item for sale on another website you can enter the web address for it which will help your friends when it comes to buying the item.
You can also select how important the item is to you. Items on your list are ordered most-wanted first./p>
Once you've entered the basic details the Big Gift List will automatically attempt to find a suitable image for the item. If the selected image is not to your liking you have a number of options: You can click the 'Find Images' button to display a selection of other potential images, you can supply an URL for the image, you can upload an image (or take a photo if you are using your phone)*, or, you can decide to not show an image.
Once you're happy with everything click the Add Item button to finish.
Step 5. Getting ready to send invites
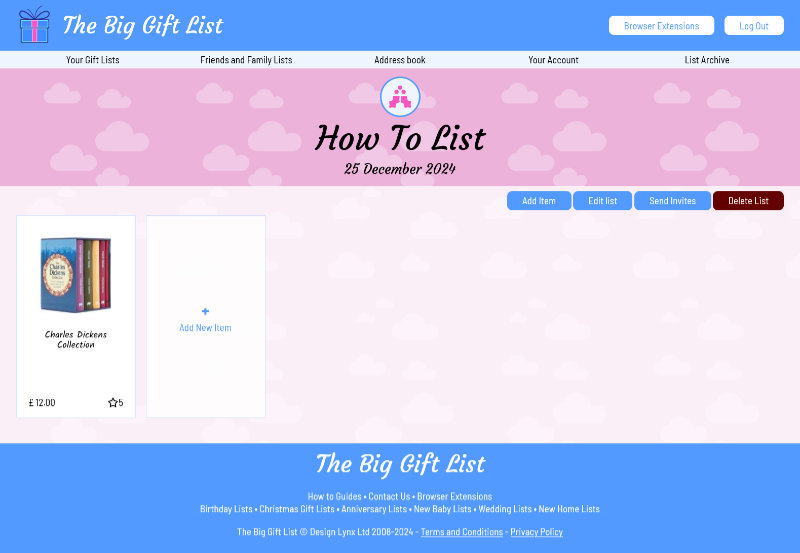
We can now see our first item on our list. If you need to, you can make further changes to the item by clicking 'Edit'button that appears when you move (or tap) over the item. You can also delete the item by clicking the trashcan icon, and you can view the website you assigned to the item by clicking the eye icon. You can move items to other lists by editing them.
Lets now invite some friends to view the list. Click 'Send Invites' above your list items (or, if you are viewing all your lists you can click the envelope icon to send invites).
Step 6. Sending Invites
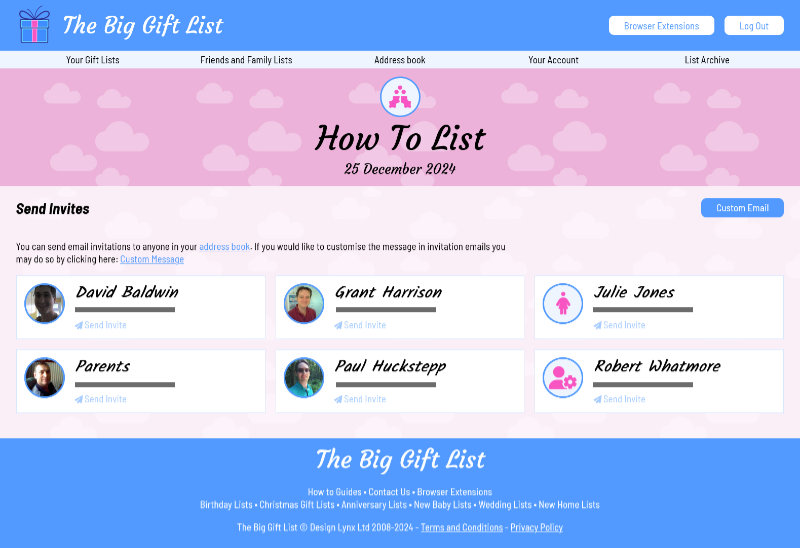
The Send Invites page will display all of your address book entries. Anyone that has been sent an invite will have a badge top right indicating that they can already view your list.
If the display is empty you should first click the 'Address Book' button on the menu to add in the names and addresses of your friends. Once you've added at least one friend you can return to your list to send out invites.
Sending invites couldn't be easier, simply click the 'Send Invite' button for each person in your address book that you would like to invite to the list (you can always come back and send more invites later). Once invited a badge will display on their entry to show that they can now see you list.
The invite notification message can be customised. If you would like to do so click the 'Custom Email' button at the top of the page.
Should you need to you can also resend invites, or, uninvite friends to a list.
Important: When you are setting up your address book you need to make sure the email address you supply for the friend is the same one they use when they sign up (if they don't already have an account) otherwise they will not be linked to your list.
Step 7. Invites away
Once the invites have been sent your friends will receive an email about your list along with registration and log-in instructions should they require them.
They will now be able to see your list and select items they would like to buy you. Remember, you cannot see what items have been selected by your friends until the day AFTER the list finishes (unless you've selected to see taken items early).
You can now send additional invites, or return to the list to continue adding items, or even request invites to view your friends lists.
I've Received an Invite, How Do I Use The Big Gift List?
Step 1. Getting Started
Once you have registered and logged in you will be presented with 'Your Gift Lists' page.
From here you can quickly access your own active lists. At the top of the page you will find the quick menu that will allow you to access all the main features of The Big Gift List; Your Gift Lists, Friends and Family Lists (including those lists you haven't been invited to yet), Address Book (for sending invites), Your Account (for updating your contact details) and the List Archive (where you can save finished lists)..
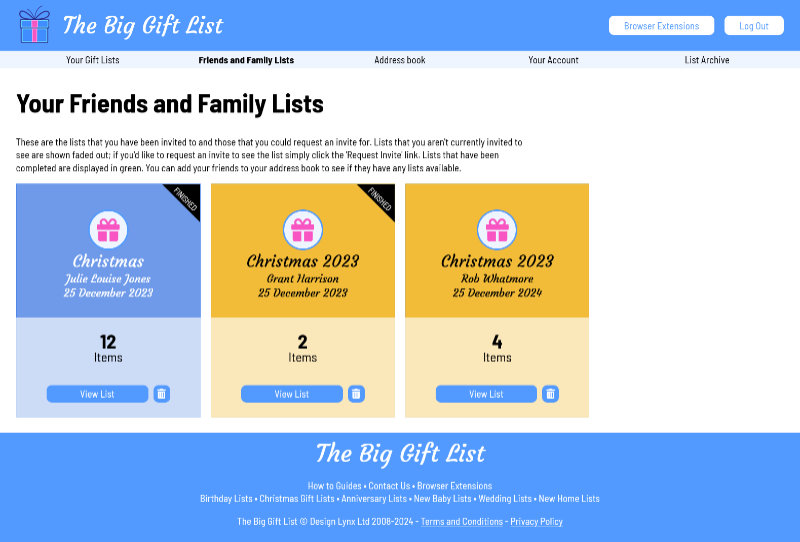
To view the lists that you have been invited to, or to see if your friends have any lists you could request an invite to, go to the 'Friends and Family Lists' page.
Step 3. Browsing the list
From the 'Friends and Family Lists' page you will see all of the lists you've been invited to along with any lists that your friends have created that you haven't as yet been invited to. For those lists you can click the 'Request Invite' button to notify them that you would like to be invited to view their list.
To view a friends list (that you have an invite to) simply click (or tap) on the 'View List' button.
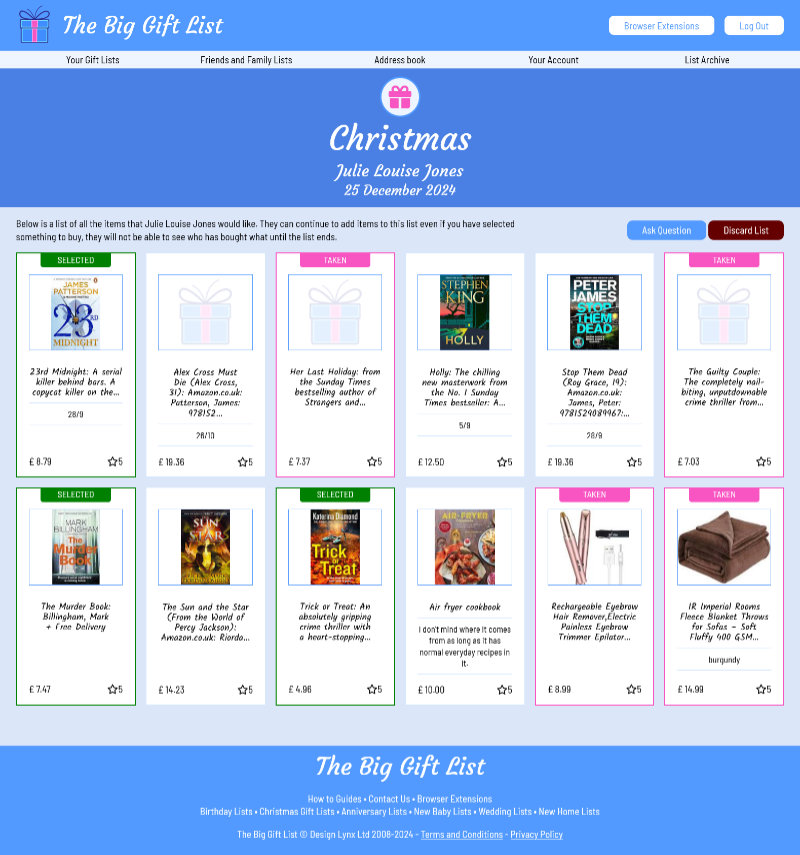
You will now see a list of items that your friend would like in a similar way your own lists are displayed. Items that have already been selected by other people are highlighted as 'taken', and items that you have selected will be highlighted as 'selected'.
The list is sorted by most wanted first as shown by the star rating in each items entry.
To select an item, simply look through the list and click the 'Select' button that appears when you move your mouse over the item (or tap on phones) - you can always change your mind later. Once selected the item will be assigned to you (unless your friend wants more than one in which case it will show as available until the amount requested is exhausted).
Step 4. Selecting an item
Once you've selected an item it will be highlighted in green and 'Selected' will be displayed at the top of the item. Any other person viewing this list will see the item displayed in purple and tagged as 'Taken' to avoid them from selecting the same item (unless the lists owner wants more than one - you have the option of assigning more than 1 of the item if you want to).
There will also be a new option available - Unselect. Clicking 'Unselect' allows you to remove yourself from the item and allow someone else to select it instead; this could be because you have either decided to get something else, or perhaps you were unable to get the item.
Step 5. Go and buy the item
That's all there is to it. All that's left for you to do is to buy the item for your friend and wait for the big day (if the item in the list has a 'View Item' button (an eye icon) you can click it to view it in an online shop to buy).
If you need to ask the list owner a question you can do so by clicking the 'Ask question' button at the top of the list. Questions are sent to the list owner anonymously to avoid spoiling any suprises.
* All images you upload are subjected to moderation. If the image you upload is deemed to be unsuitable for this website it will be removed without warning. If you continue to attempt to upload inappropriate images you account may be suspended. Please see our terms and conditions for full details.
